
I have seen loads of these khamsa string art designs on Pinterest and Etsy and thought why not show you how to make one yourself? There are many ways you can make this; the version for adults tends to use a wooden board and nails, but this is a little more low key version.
This is a fun way to bring Moroccan arts and crafts into your home. Ok its not completely Moroccan in how the craft is completed but it has the right spirit! Of course you can use the same steps and idea and substitute the pushpins for nails and the foam core for a wooden board if you want to make this as an adult or for older kids.
This is a no mess activity but you will want to have some supervision especially with younger children as the tacks are sharp. For really young kids, you may even want to do the first steps of setting up the design and let them do the weaving of the string.
I suggested certain colors but you can use whatever you have on hand.
Why the khamsa?
In Moroccan Muslim as well as broader Jewish cultures the khamsa is a sign of protection from the evil eye. Much like the blue eye is in Turkey and Greece. Often times you will see people wearing jewelry with this design or displaying it in their homes or the rearview mirror window of their car!
If you’d prefer a different design I also have a pattern to do a cactus string art instead.
Creating the Khamsa Design
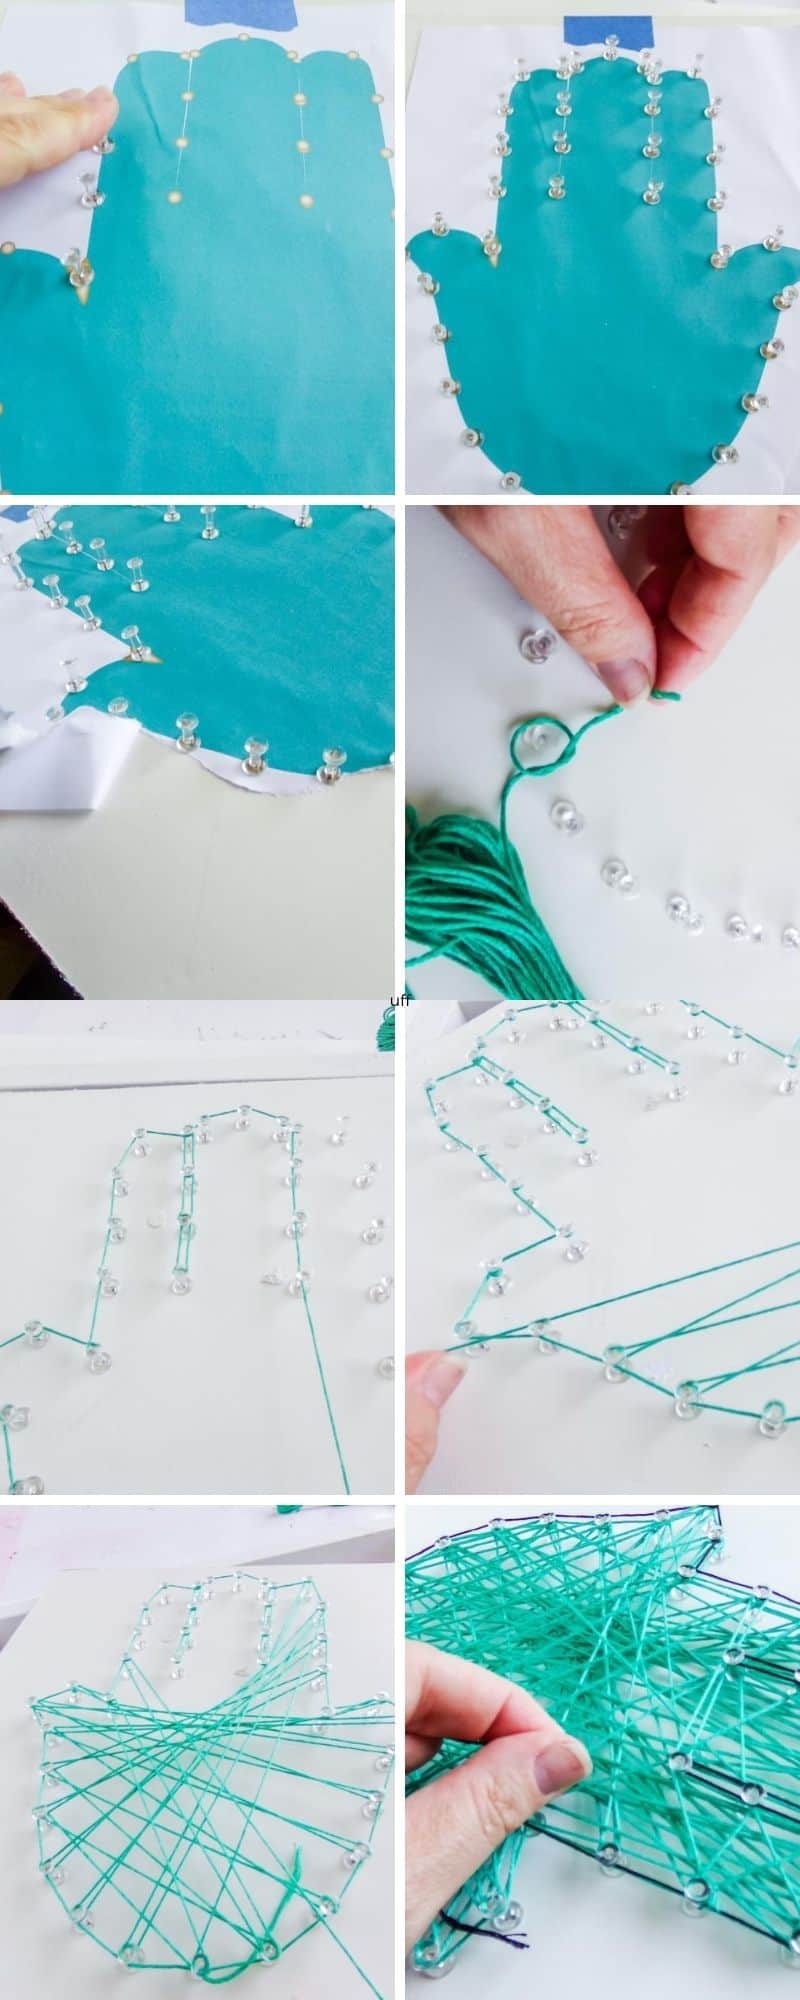
If you’re someone that is very visual, here is an additional image that shows a step by step walk through of the how to create this project from start to finish. The images flow left to right and downwards. You’ll find additional written instructions and images in the text below the step by step image.


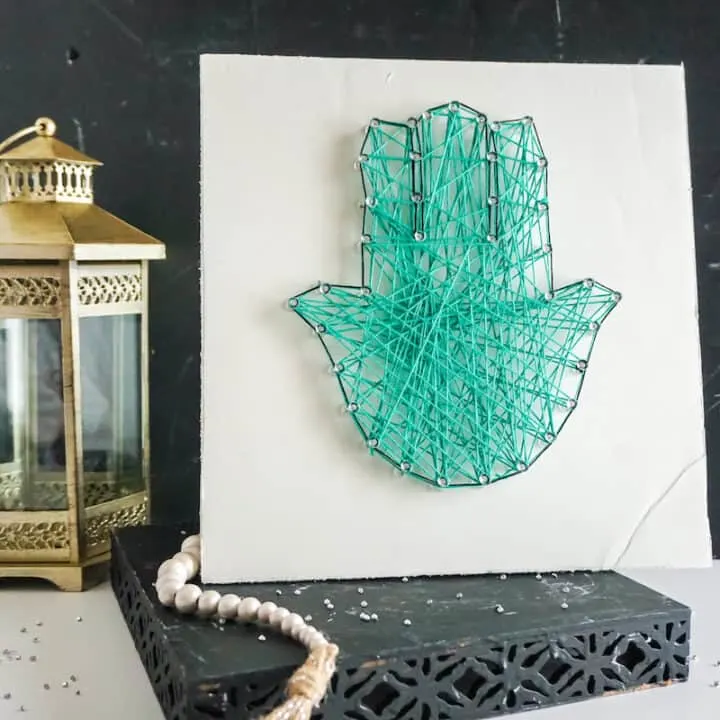
Khamsa String Art
This is a fun craft designed for kids however people of any age can enjoy making this simple, easy khamsa craft.
Materials
- 2 Pieces 9x12 (or larger) Foam Core Board
- Pushpins
- Teal Embroidery Thread
- Black or Dark Green Embroidery Thread
Tools
- Printable Hamsa Template
- Painter’s Tape
- Scissors
Instructions
Glue the two pieces of foam core board together. I did not do this at first and learned my lesson. The doubling of the board provides enough thickness that the pushpins won’t stick out the backside.
Tape the khamsa template to the front of the foam core board piece.
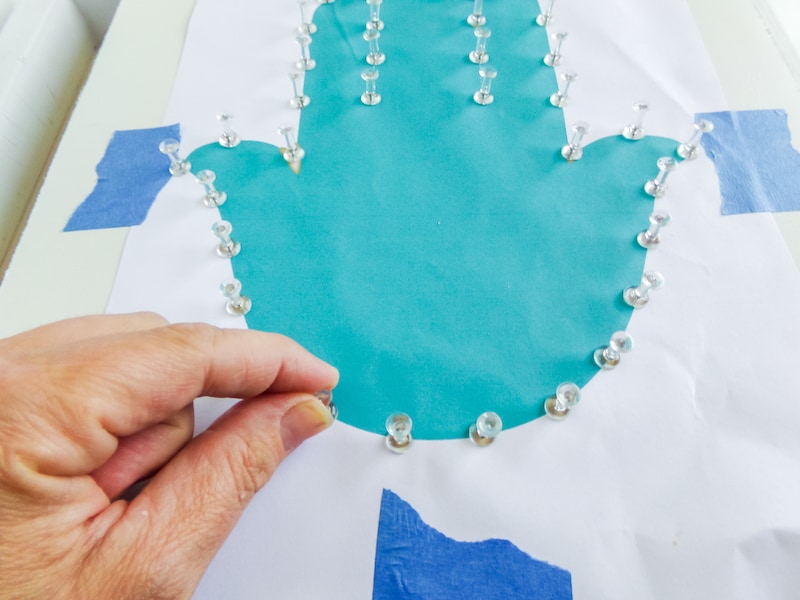

Stick the pushpins in the designated spots on the template, pressing them into the foam core board firmly so they won’t fall out. If your child would prefer to add more pushpins than we did, that is certainly allowed, the khamsa template just has the minimum required to get the shape.
Gently pull the template off the foam core board and pull out any hangers-on pieces of paper.
Tie one end of the teal embroidery thread to a pushpin on the board.
Wrap the thread around the pushpins in as random a pattern as possible, sometimes crossing over the palm of the shape, sometimes going side-to-side. There is no right or wrong with string art.
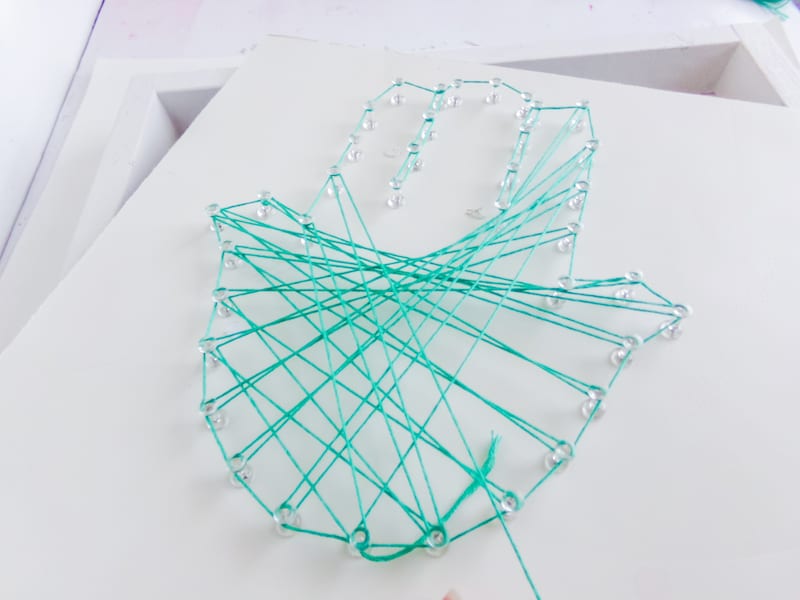
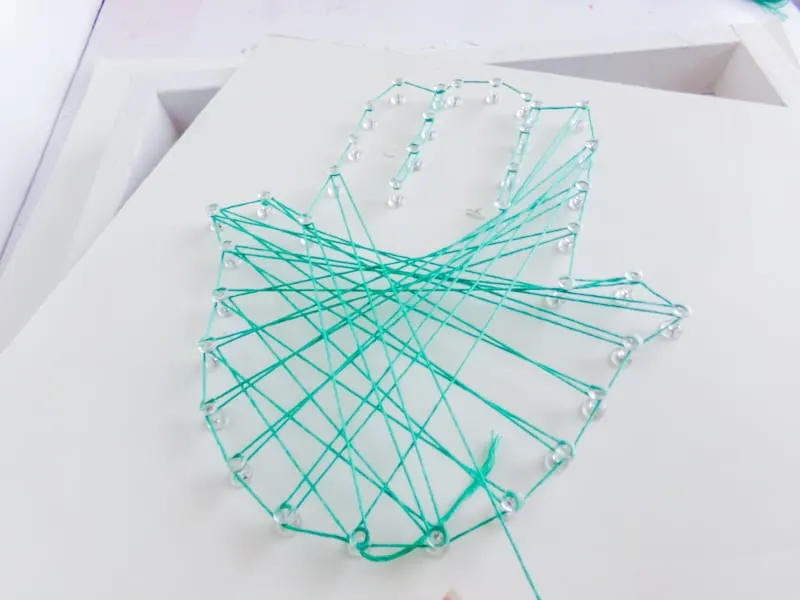
When your child has added enough string in their estimation, tie off the thread on a pushpin and trim the length.
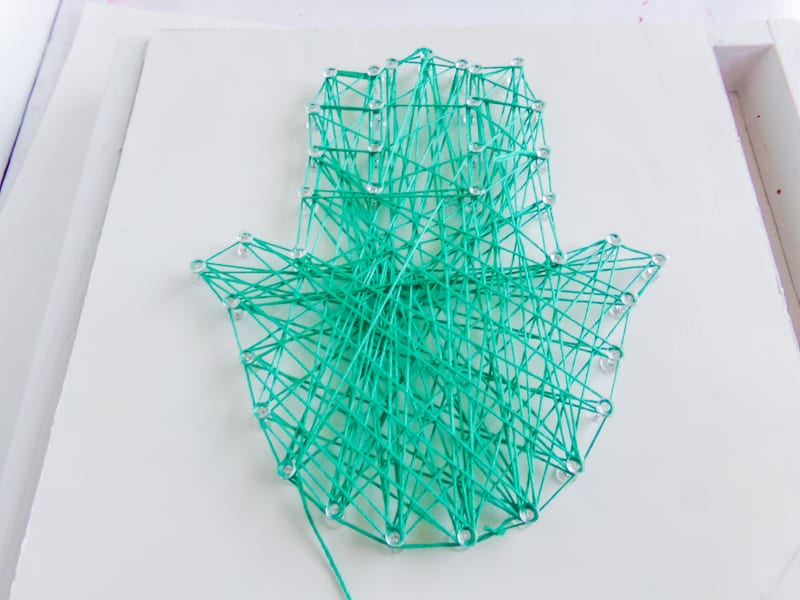
Repeat with the darker green embroidery thread, tying off the end, but this time, wrap the thread around each of the pins in order to outline the entire khamsa shape.
When your child reaches the pushpin they started on, tie off the loose thread end and trim. Then enjoy!

Notes
Times listed are just estimates. You may find it takes you much more, or much less time.
Recommended Products
As an Amazon Associate and member of other affiliate programs, I earn from qualifying purchases.


