
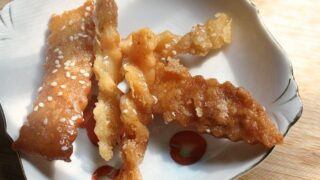
Chebakia is a favorite Ramadan treat in Morocco, and even if you’re gluten-free you can replicate the flavors with this recipe.
Gluten-free
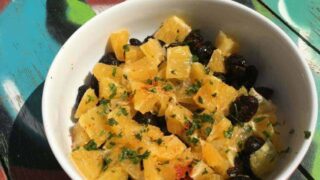

We are spoiled rotten in Morocco with oranges all year round. But, if you ask my opinion, I think the best oranges appear in winter. What are these delicious little bites of sun-soaked goodness? Mandarins. Some smart marketers in the US started calling them cuties a few years ago and now whenever I see them …


One of the most frequent questions I get in my inbox relates to food allergies and visiting Morocco. This is something we were very worried about before our move. Our youngest son has an allergy to cucumbers and MarocBaba was diagnosed with celiac disease a few years ago. If you’re going to travel to Marrakech or …
[vc_row][vc_column][vc_column_text]Even though today is the first day of fall, the weather barely feels like it. Our daily temperatures are still topping 90F, while evenings cool down to the mid-60’s. I am seeing so many friends posting pictures of the leaves changing colors, apple orchards, jeans and sweaters, and all of the other signs of fall. …
I don’t often think of fish dishes when I’m making a recipe but they really are a great example of easy Arabic recipes. You might be surprised how many fish and seafood dishes are made in Arab countries. This recipe is a guest post that was shared shortly before we moved to Morocco in 2013. …


If you’re someone that loves the idea of ketchup and eggs then you’ll probably love harissa scrambled eggs! Harissa is one of our favorite condiments in Morocco and it’s really not as spicy as you might think. It seems way to early to start thinking about back to school – seriously where did the summer …