I’m not a great baker, and I rarely attempt to make anything fancier than a bundt cake or cupcakes. Every year for my kids birthday I do attempt to make whatever kind of cake they want. Sometimes it turns out great, and sometimes it looks more like a #PinterestFail.
We are big on having tea parties around here. It’s basically something that happens every afternoon but it’s not always as fancy as you might thing. It’s certainly not like having high tea in London. But, there’s always tea and coffee and usually there’s at least one thing that is sweet and one thing that is a little savory.
I don’t always bring something to the table – usually it’s our extended family that gathers. But these little cakes are the perfect option for something to put together. They look great, they’re simple and you probably have everything in your pantry already.


How to make mini cakes
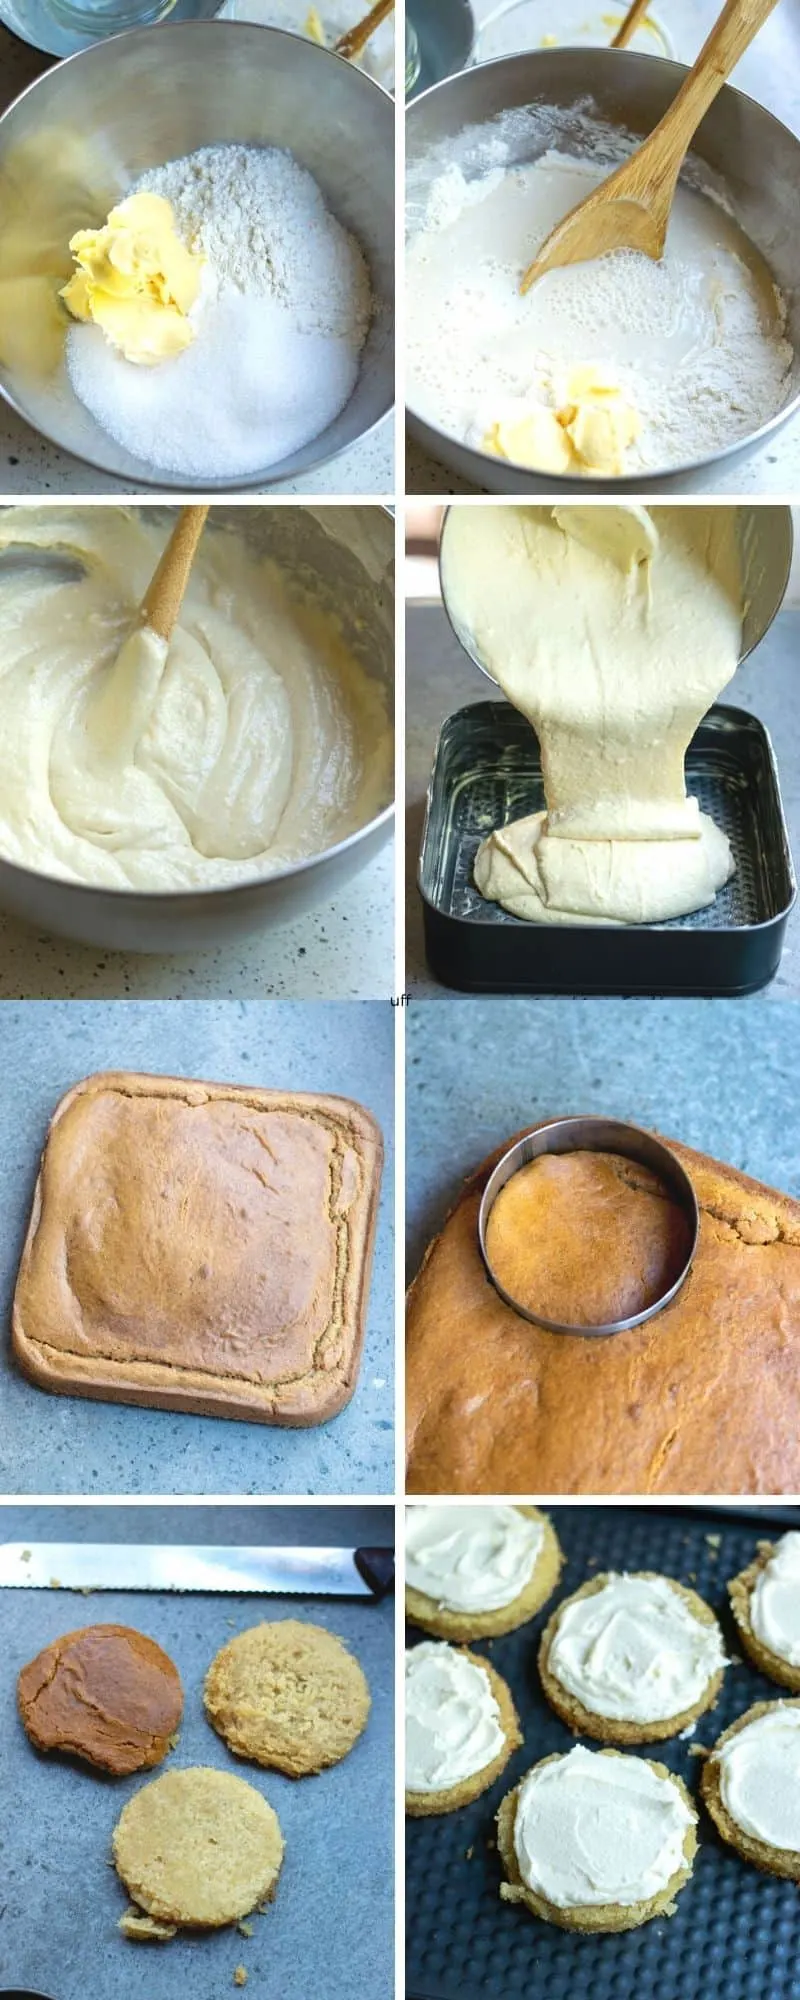
All of these little cakes come from a single pan. Surprised? It’s true! All you need is a square baking pan, a round cookie cutter and a knife. Each of those little rounds are cut into equal layers of cake with some frosting in between.
They’re that simple!
For the fruit toppings you can truly do whatever you want. Use seasonal fruit and mix things up. The cake flavor itself is versatile enough that you can use a variety of toppings. If you want something sweeter, you can use chocolate shavings, or even crushed cookies.
So let’s get to the oven non-bakers and show me what you got! Below you’ll also find the step by step of mixing together the cakes. Start from the left and move to the right and down for all the steps.


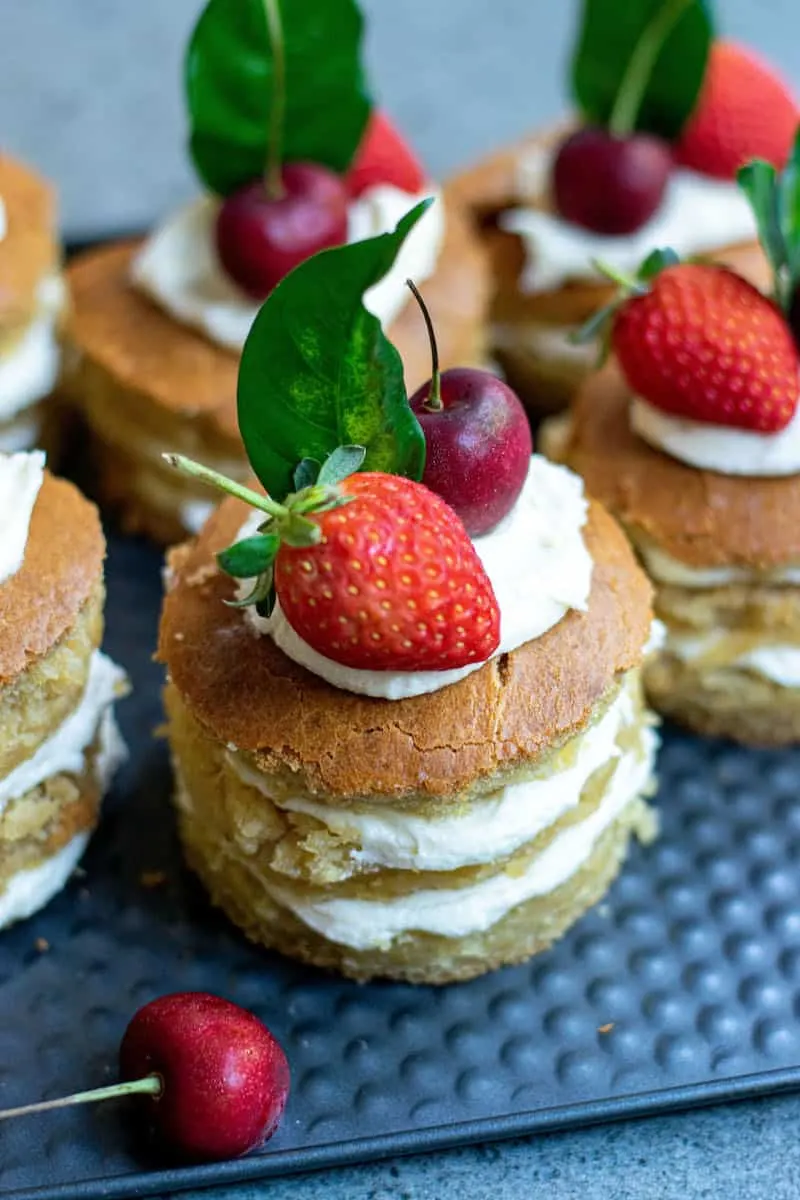
Easy Mini Layer Cakes with Fruit
Think you can't make a layer cake? Think again! These mini cakes are much easier to make than you think.
Ingredients
Dry Ingredients
- 600g self rising flour
- 250g white sugar
- 2 teaspoon baking soda
Wet Ingredients
- 300 g butter
- 600 ml milk (or dairy free milk like almond)
- 2 tablespoons apple cider vinegar
- 2 teaspoons lemon juice or lemon extract
Frosting Ingredients
- 1/3 cup / 72 g butter
- 2 cups / 270 g powdered sugar
- 1 tablespoon lemon extract or lemon juice
- 2 tablespoons milk
- Cherries, strawberries and mint leaves for decoration
Instructions
Pre heat the oven to 180 C / 350 F. Grease a 25 cm x 25 cm (or a 9" x 9" pan) with 1 tablespoon butter.
Mix milk, lemon juice and vinegar together. Set aside.
In a large bowl, add all dry ingredients with butter. Pour the milk mixture into the flour and combine well with a wooden spoon.
Pour the batter into the baking pan. Slide into the oven and bake for about 70 minutes or until a toothpick comes out clean.
Prepare the Frosting
Beat icing sugar and butter together then add milk and lemon juice. Whisk until you get a white creamy texture. Set aside and place in the refrigerator until ready to use.
Remove cake from oven and let completely cool down. Use a circle biscuit cutter that's 7cm. (you can use any size you like but it may affect how many final cakes you end up with.) Cut out 7 round pieces of cake.
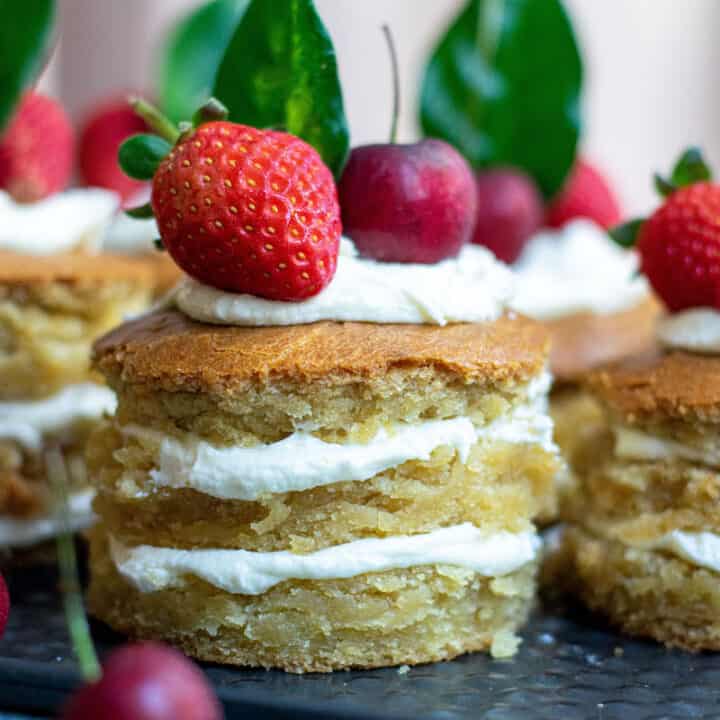
Slice each of the pieces of cake into 2 or 3 layers. You can decide how thin you'd like the cake layers.
Spread frosting on first layer then second and third depending on how many layers you wish to make. Leave enough frosting for the top of each mini cakes. Decorate with berries and the leaves.