
Two years ago I watched an interview of the Australian Minister of Tourism. The more I was listening to him the more I was surprised about his future goal: he wanted Australia, my home country, to be the multicultural food destination in the world.
I always thought we were all about surfing, beaches, kangaroos and the outback!
A surprise? Not really, the journey of taste is becoming such an integral part of the travel experience. Open Instagram on any travel influencer feed and you soon realise how food photography is becoming an integral part of the visual story.
Food photography in a studio is not as complicated if you have a good experience with artificial lighting. You can decide how to light your subject, create your background, move your dishes.
This may not be that easy on a trip.
Whenever I travel, and I blog my experience, I like to add few photos of local dishes and, when possible, of people cooking them.
There are a few things I have learnt over the years of travelling. Here are a list of tips, suggestions and facts useful to know.
Camera size matters
The smaller you go the better it is. You do not want to intimidate the locals moving around the tables with a chunky DSLR camera.
The same applies when you go to a market or you make photo of street food stalls. The more professional you look the more unconfident and unnatural will be the photo.
I will list later my top 3 cameras for food photography when travelling. This is another article with a longer list and more technical information you may need.
As a quick tip I would try to stay on a small mirrorless camera
Lighting for food photography: use natural light

Avoid harsh light, from a flash, for two important reasons:
- The photos will look flat as you eliminate most of the shadows and, where still there, they will be very dark, missing out on a nice mid-tone range in your image.
- You want to avoid any artificial light in a restaurant or on someone’s face. It’s just a no go when travelling
Try instead to stay close to a window, to have a bit of side light, or even better sit outside the restaurant but avoid direct sun on the food, especially around lunch time.
Ideally, try to have a seat in the shade (better if overcast). You can use a small inflatable 20-30cm light reflector, or even the menu (if on white paper), to add a bit of light on the side.
Familiarise with the camera setting

You should know your camera setting otherwise you may miss the moment. I would avoid reading the camera manual in a restaurant.
The good news is that you can practice at home.
The exposure of the photo is based on 3 important pillars:
- Shutter speed
- Aperture
- ISO
When shooting a dish you can use a shutter speed of 1/60sec, or even lower at 1/30sec, if your camera/lens has image stabilization.
If there is not much light I would use the biggest aperture you have in your lens (the small F-Stop number).
If you have an interchangeable lens camera I would suggest to buy a prime with an aperture of F/2.8 or less. Here you can find some good travel lenses based on your camera brand.
If you still do not have enough light in your camera (the photo is dark) then you need to pump up the ISO value.
Watch out because high values of ISO unfortunately introduce noise in your image.
As an exercise, take a couple of lemons on a dish and put them close to a window. Try different settings and also light reflection techniques till you have the best texture in the lemon peel.
Blurry background

You have two possible techniques to blur your background, you can use both of them at the same time if needed:
- Use the widest aperture that you have (the smallest F-Stop)
- Get your lens as close to the subject as possible (without creating distortion)
Why do you want a blurry background?
Simply because you want only your subject sharp so that the attention of the eyes go straight on it.
The important thing is that you focus your lens on your subject otherwise you end up with a full blurry photo. Again, practice makes perfect
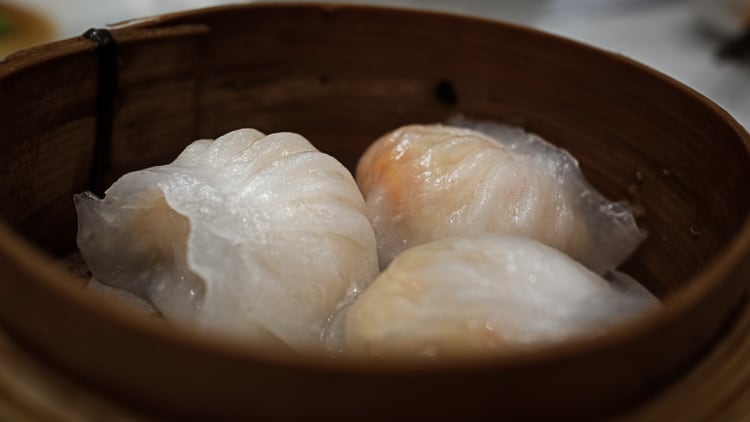
Shoot and eat
It seems pretty obvious however I still see photos of half-finished dishes with comments like “Amazing…”.
This is something you may want to avoid because the design of the dish is more important than the taste in the media world. People can look at your photo and almost eat the dish with their own eyes, they can’t smell it on Instagram or any social (that would be a great feature to have!).
You can add more photos later to show the ingredients and maybe create a story (because you have visited the cheese factory the day before, or the organic vegetable garden etc).
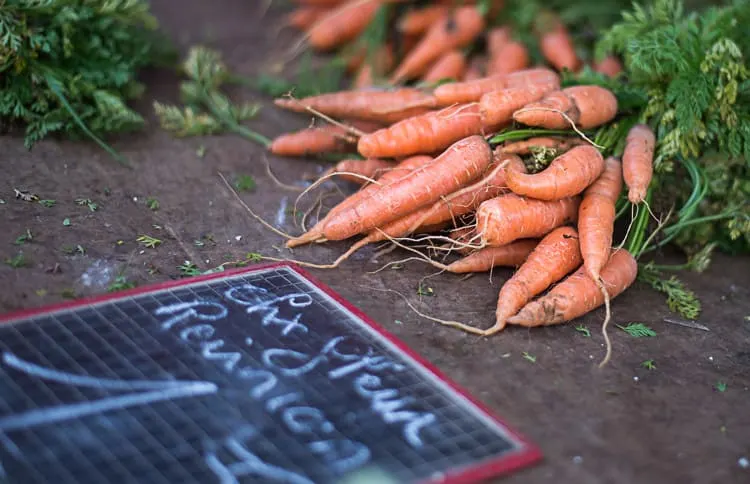
Markets

A must visit in any trip is the local market. That is where you will most probably find the ingredients used for your dish at the restaurant.
Any city, town and village has a interesting food market, especially if you are in Asia, Africa or South America.
Lots of colours that create an amazing contrast.
I like to add also the people working at the stalls, maybe after a chat and their approval. Buying something is an easy way to break the ice.
I find even more interesting the fish and meat markets. Some of them are just a unique experience however you may have to wake up very early in the morning.
When I have a trip I usually check on the net the opening hours of the markets in the places I visit, if any. Once in town I ask at the hotel, to the taxi driver or the first restaurant I visit for new tips that, in the past, have honestly changed dramatically my trip.
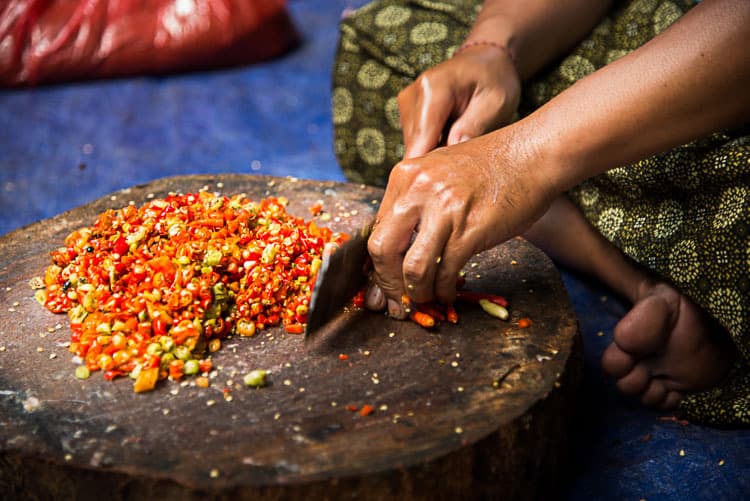
Behind the scenes
The beauty of food photography when travelling is that you may be able to experience the lot, from the ingredients (at the market) to the food ready on your dish (at the street stall or restaurant).
There is still one corner we have not touched, the behind the scene, the busy kitchen.
My experience is that if you visit the restaurant outside peak time and ask about access to the kitchen you will be more likely to be invited with open arms, especially if you mention the reason (blog, Instagram etc)
In case of street food it is obviously much easier.
Also have a check for the local festivals. I found one, in my last trip to Bali, where I had access to the full “food chain”, just awesome.
And honestly, in the worst case scenarios they just answer that is not possible, not a big deal isn’t it.

Best camera for food photography when travelling
As I previously said, the smaller the better. If you have an interchangeable lens camera then use a small prime (in the focal length range of 28 to 50mm).

The one I am really in love is the Fujifilm X100V. This is a super small camera with fixed lens that you can use for both food photography as well as landscape or street photography.
I can’t recommend it enough. Amazing sharp photos with an exceptional lens to create easily a blurry background.
The only drawback is that your legs are the only zoom capability.

If you are after a compact camera then the Sony DSC-RX100 IV is what you are looking for. The fantastic optics made by Zeiss are sure to satisfy your needs. Keep in mind that there is now the RX100 V in the market however, in my opinion, it does not provide any particular benefit for food and travel photography, unless you are after some heavy action sport (thanks to the greater burst shooting)
Now that you’ve gotten lots of helpful hints on which camera to pick up and a few tutorials on how to take better food photos get out there and start snapping!
Looking for more tips? Check out this post on how to take better food travel photos and food photography tips from Amber of With Husband in Tow!
Author Bio:
Stef has lived and worked all over the world, but now calls Melbourne home. He successfully runs MEL365.com, a travel photography website that focuses on visual stories from Australia and around the globe. His cycling and travel photography work has been published in magazines and websites internationally
Eric
Wednesday 1st of August 2018
These are great tips. I like to play with different angles with food photos. I get a lot odd looks in restaurants when I get out of my chair to play with different angles, but when I get the photo I want, it's totally worth it.