
When I started to consider undertaking this recipe I wasn’t sure where to start. I have made a lot of different types of Moroccan breads but this specific bread I couldn’t find anyone to give me a one-on-one lesson. So I had to go back to the way I used to learn how to make new dishes – a whole lot of research.
Moroccan challah is different from European style challah breads. It’s not as eggy – in fact in a lot of recipes there is no egg at all. It’s also not typically braided. Some say sugar or honey is not needed at all while others believe it important for the yeast to activate correctly. It seems a rule of thumb is that the most prominent flavor in a Sephardic challah is the flour and nothing else.
It also varies a lot between families. Some do it one way, others do it different. So essentially there is no single authentic, correct recipe. I am not claiming this is THE only way and if you are preparing this for religious reasons you should absolutely check the ingredients with your beliefs.
I think one of the keys to making this taste great is making sure that it is kneaded enough. I chose to hand knead it because I find the process relaxing but you can mix it in a stand mixer as well. You want to keep kneading until the dough is soft, not sticky and springs back when you push your finger into it.
I found another tip for making it have a lighter texture is sifting the flour. From different sources I read sifting the flour is actually an important part of making challah because it removes any impurities that may have fallen in (like bugs, rocks etc). I rarely do this when baking but will do it from now on when I make bread.


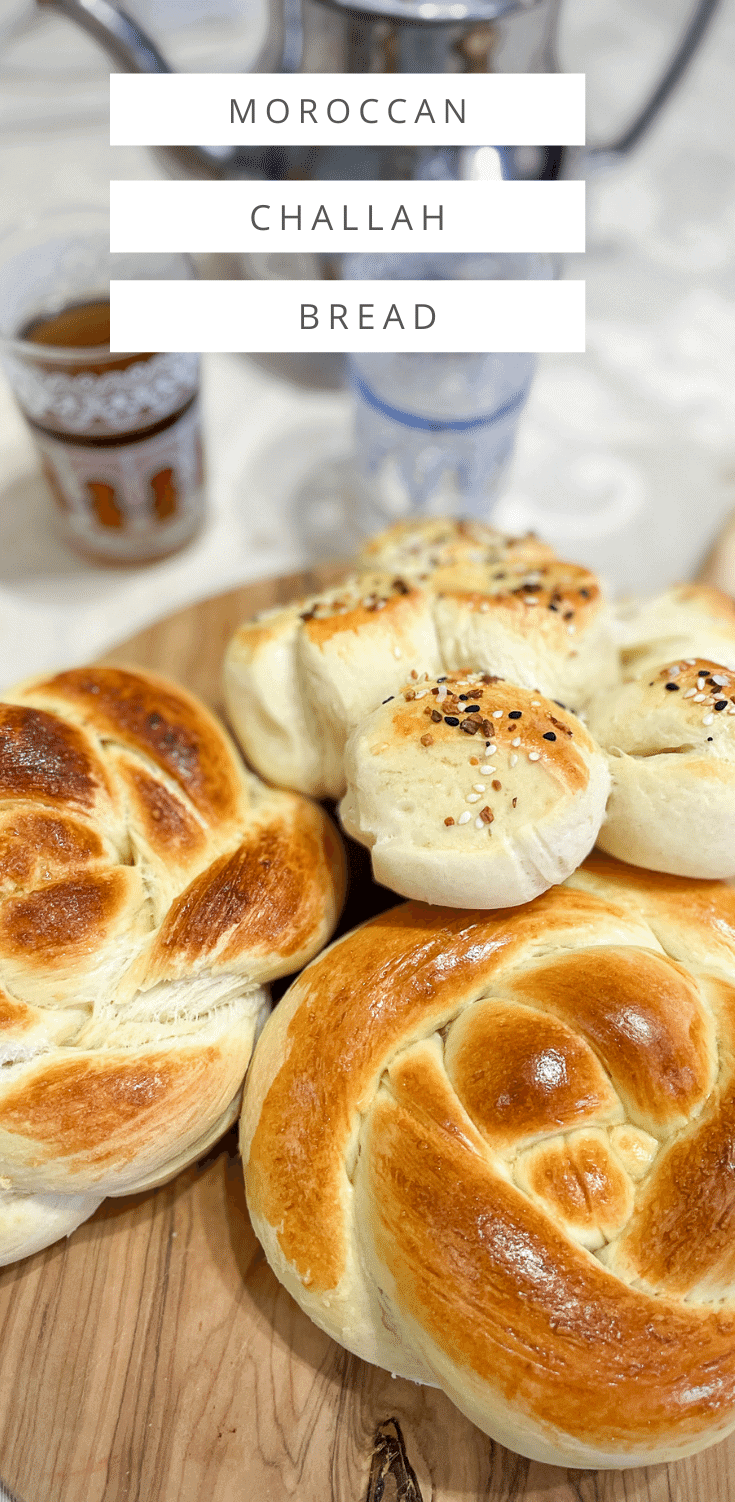
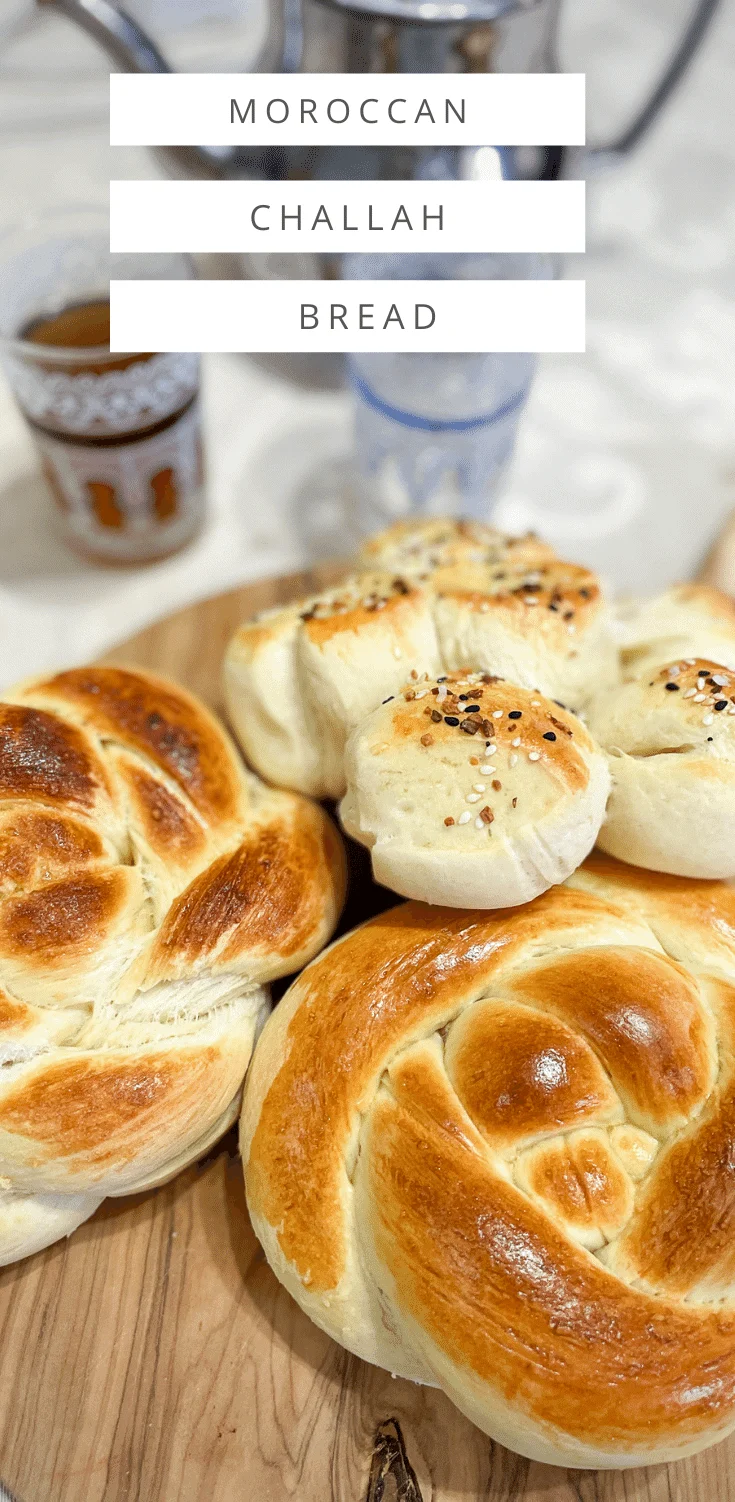
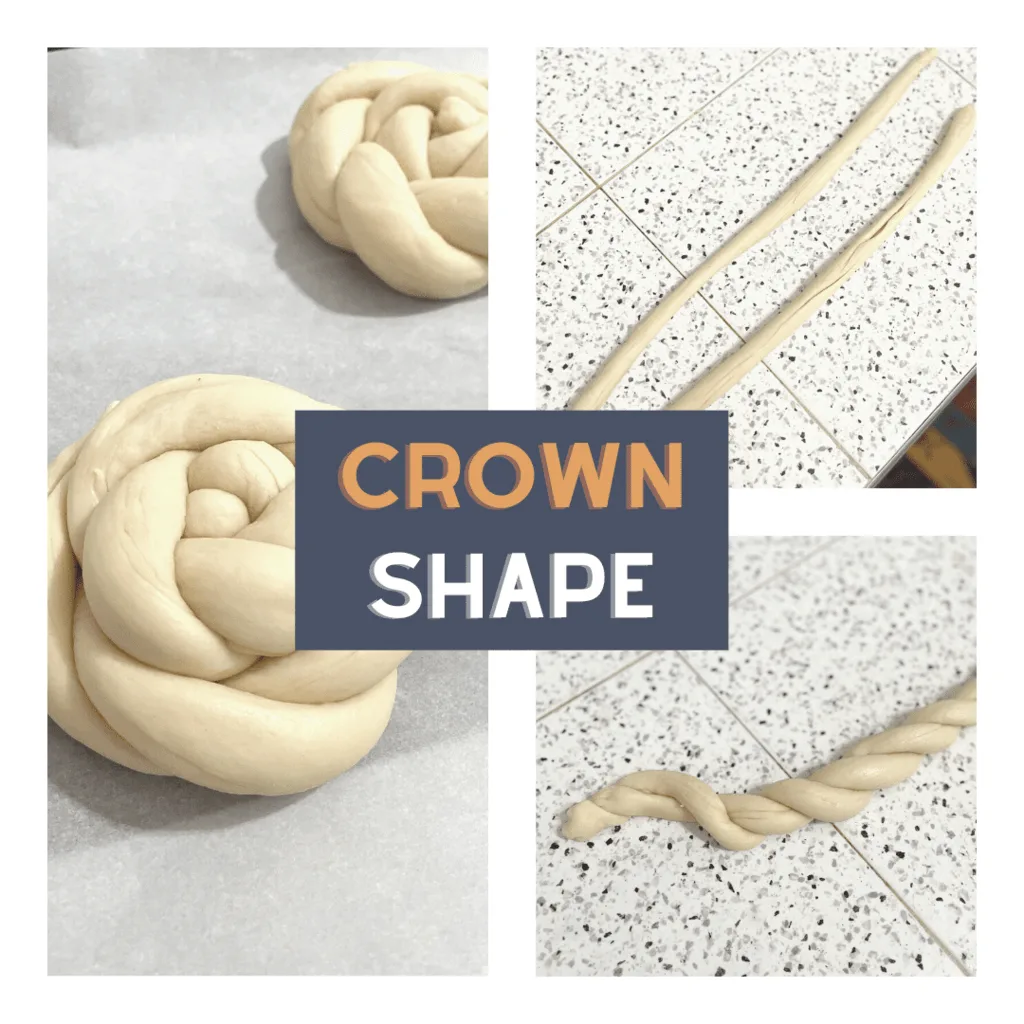
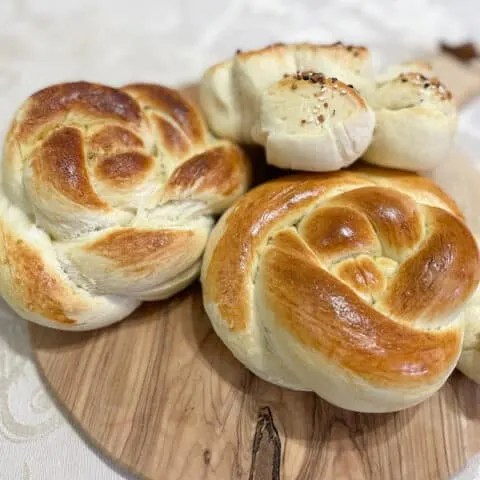
You can shape your challah in anyway you would like, these are two different shapes that you might find in Morocco. They are both very easy to make. The crown shape is just two rolls of dough that are wound together and then coiled into the shape below. This shape really reminds me of how meloui is made but in a larger form.

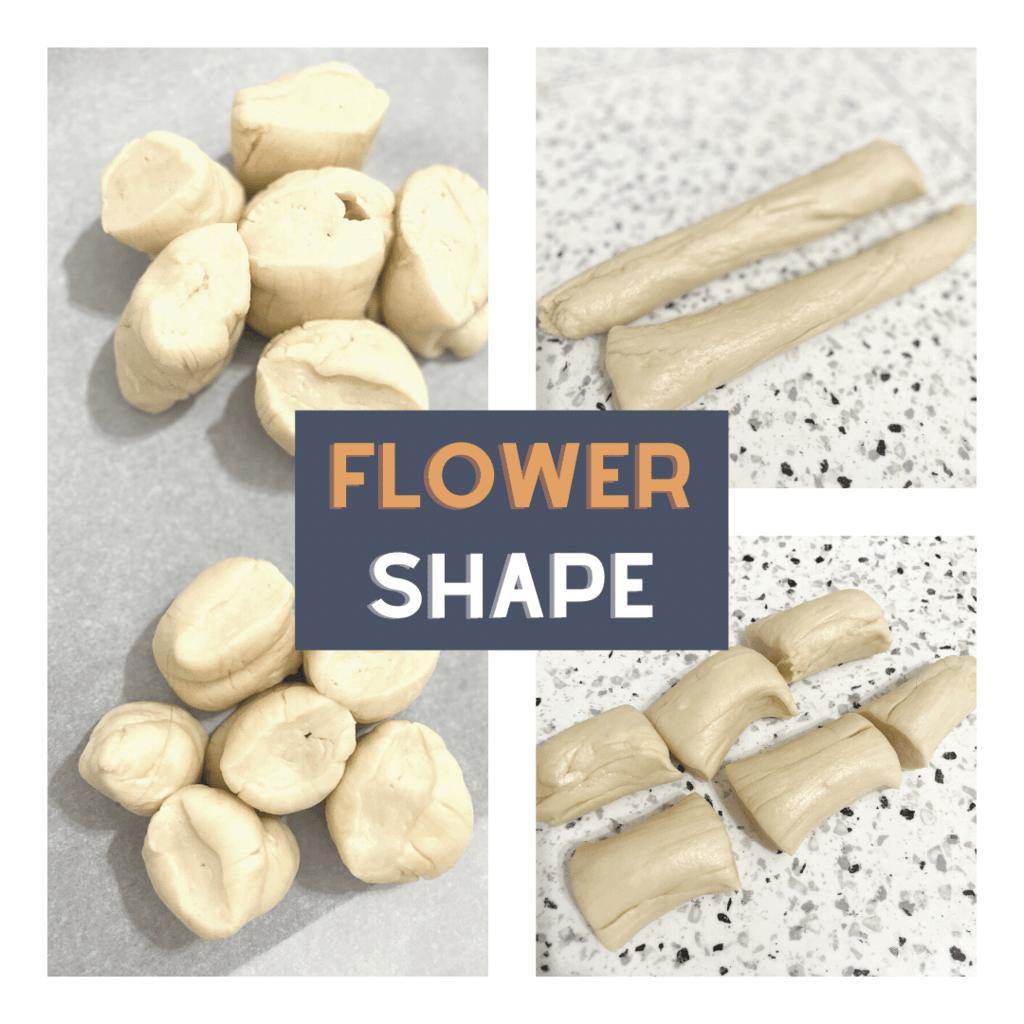
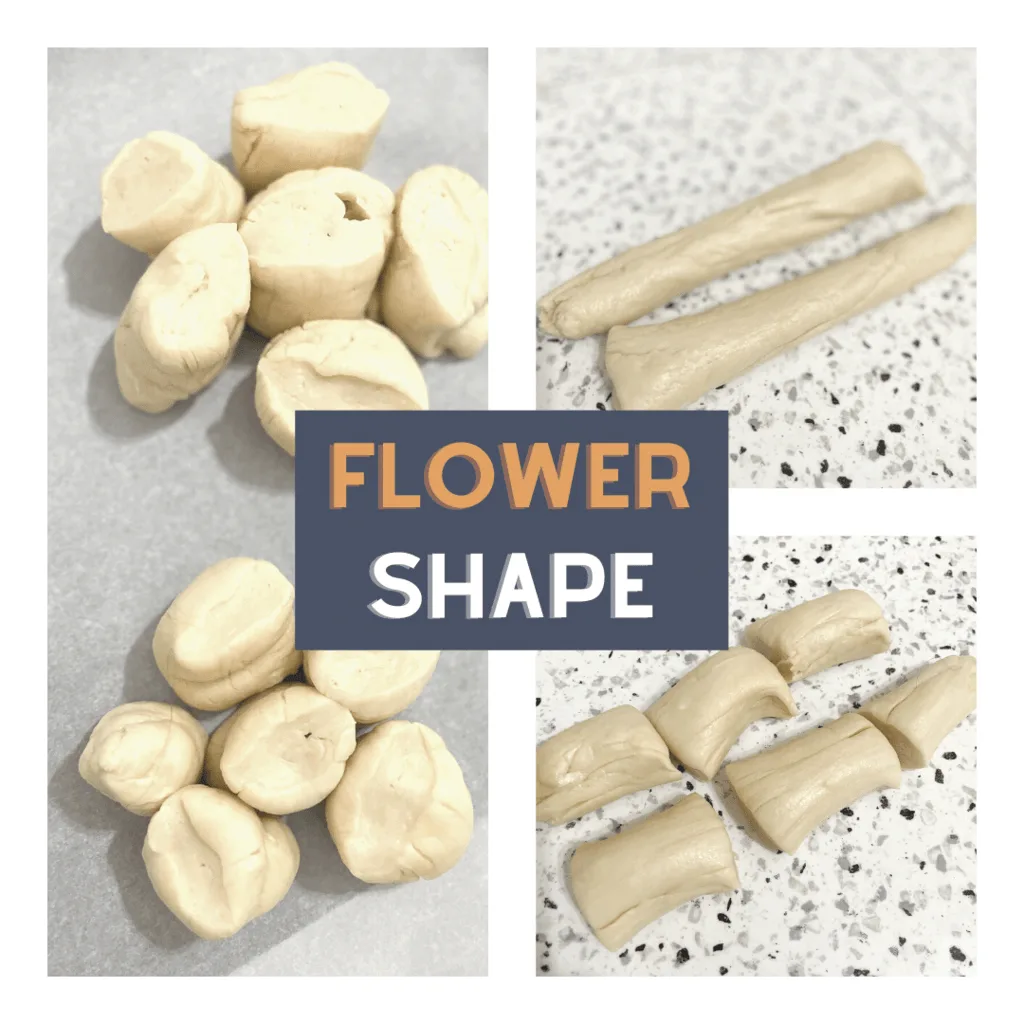
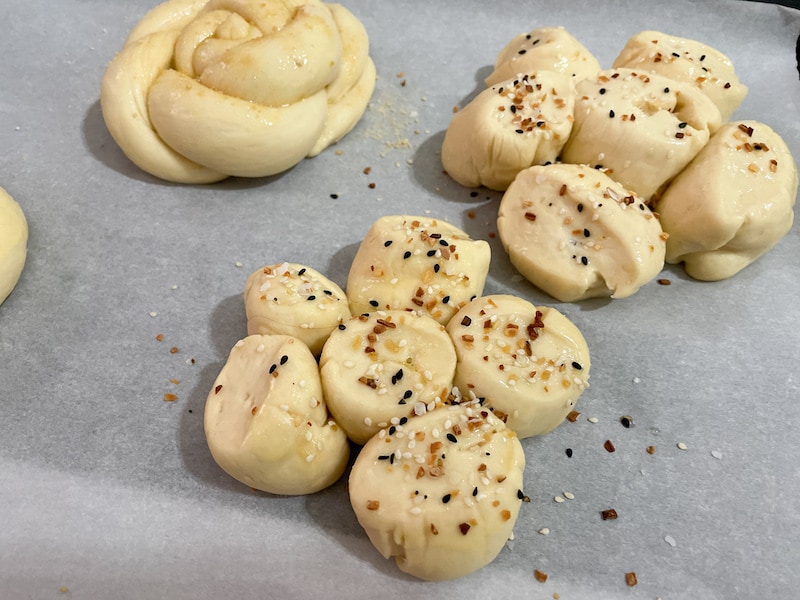
The flower shape is one that I have seen with other bread types in Morocco so it feels very fitting. It’s also really easy to make and perfect for serving because each petal can be easily pulled off. The six even shapes of dough are arranged just like a flower. The second rise is what pulls them together.
So set aside a little bit of time and get ready to dig in. I think you’ll love this recipe! I finished mine with everything bagel seasoning on the flower breads and cinnamon sugar on one of the crown loaves. In Morocco you might find them studded with anise seeds, nigella seeds or sesame seeds. You could certainly mix it directly into the dough as well.
Pair this challah with Moroccan dafina, a traditional shabbat meal.


Moroccan Challah Bread
A simple Moroccan challah bread that can be customized based on your taste preferences.
Ingredients
- 4 cups white flour
- 1/2 Tbsp honey or sugar
- 2 Tbsp dry yeast
- 1/2 Tbsp salt
- 1 egg
- 1/4c vegetable or olive oil
- 2-3 cups warm water
- a bit of extra oil to brush the dough with or an additional egg (for the wash)
- sesame seeds, anise seeds, sugar, and cinnamon, or other spices to top the bread
Instructions
You will need a large space to mix and knead your dough if doing it by hand. My instructions will be for hand kneading though you can use a stand mixer if you have one.
Sift the flour to remove any impurities and lighten it a bit.
In a small bowl add the yeast, honey and a bit of warm water. Leave it alone for 3-4 minutes until the yeast begins to bubble.
In another bowl whisk together the oil and egg.
Make a well in the flour and add the egg and oil mixture, salt, and yeast. Stir with a wooden spoon to combine the liquid and flour.
Begin to knead by hand, adding the water a little bit at a time until everything is incorporated. The dough will be a bit firm to begin with but as you knead it will soften. If it feels dry, add a little more water but only a small amount at a time.
The dough will be kneaded for 6-8 minutes until soft and smooth. Coat with a light layer of oil and cover with a towel. Put in a warm spot in your kitchen and allow to rise approximately 1 hour.
When the dough has risen, cut into 4 equal pieces. Now you can shape the dough how you would like.
Have a large baking sheet (or two smaller ones) covered with parchment paper ready for the bread.
Flower Pattern
This is my term for this shape. With one of the 4 pieces of dough divide it into two equal parts. Roll each out into equal-sized "snakes". Cut each into three equal pieces so you have 6 total pieces. Place one in the middle and then the other 5 around the center.
Turban/Crown
Take one of the 4 pieces of dough you started with and divide it into two pieces. Roll each of these out into a long snake - the thickness is completely up to you but aim for two pieces that are of equal thickness. Twist the two tubes together, pressing the top of the tube to keep them from separating. Twist until the end. Roll the open end up to create a circle shape. Press the ends into the dough so that they don't open up.
Preheat the oven to 400F, cover the dough with the towel again, and leave to rise an additional 20 minutes.
Brush the tops of the bread with a bit of extra oil or crack the egg and whisk and then brush over the top of the bread. Sprinkle with sesame seeds, anise seeds or nigella seeds. You could also sprinkle with cinnamon and sugar or leave it plain.
Bake in the preheated oven for approximately 15 minutes. It should be brown on top and sound hollow when you tap it.
Remove from the heat and allow to cool.
Notes
There are many variations on how this recipe is made. Families have their own traditions and differences.