One day before we moved to Morocco I was sitting in the doctor’s office waiting for my appointment and decided to make a list in my phone of things that I wanted to do at some point while we were in Morocco. It was a way to pass time and I really didn’t think I would do many things I listed. In fact until a few weeks ago I forgot about the list completely. I was cleaning up my notes app and came across this;
My Living in Morocco Bucket List
- Stay at La Mamounia Hotel (ha this one probably will never happen!)
- Take my parents to the Sahara
- Show my kids Fez
- Go to Portugal
- Eat tapas in Barcelona (did in Madrid!)
- See Rome at Christmas (Rome a month before Christmas!)
- Go to the rose festival at Kela’a M’gouna
- Speak conversational Darija (check!)
- Paint, draw and be creative again (check!)
- Learn to make Moroccan cookies
- Write a cookbook
- Submit a book proposal
I was really surprised to discover that I’ve done almost all of the things I had dreamed up to do after forgetting my list! So here you are today where I’m sharing the fruit of my ambitions, to learn how to make the intricately shaped Moroccan cookies. Along with my friends Heidi of Aromas & Sabores and Kate of Mosaic Road we enrolled in a cookie class offered by the Amal Women’s Training Center and Restaurant. The class happened over four Saturday’s. We specifically wanted to make the more intricate cookies instead of simple ghriba or fekkas. They offer cooking classes regularly that are a great value for when you travel to Marrakech. If you’re passing through Marrakech on a Saturday you can get in on cookie making as well. Visit their website and send an email for more information on dates and pricing.
Now onto the cookies!
Our first class we learned to make ka’ab gazelle and a Moroccan pouch cookie. I’m going to be making up the names for some of these cookies as they don’t have individual names. Ka’ab gazelle however are iconic. They’re the most well known Moroccan cookie and a wedding isn’t a wedding without platters of these. They look deceivingly simple but once you bite into one you see how complex they are to make. The pastry is very thin with a stuffing of almonds that tastes like a floral marzipan.
To begin you’ll need to make the pastry. There aren’t measuring cups here, but regular kitchen staples like bowls and cups. It’s a bit of guess work!
Tools needed:
- Pastry brush
- rib edged pastry cutter
- Pasta rolling machine (you can use a rolling pin but it’s difficult to get pastry thin enough)
- baking sheet
Ingredients for Ka’ab Gazelle Pastry
- 2 bowls flour
- 1 egg
- 1 tea cup vegetable oil
- 2 Tbsp powdered sugar
- 1 teaspoons butter softened
- 1/2 tea cup orange blossom water
Directions for Ka’ab Gazelle Pastry
Begin by mixing the flour, powdered sugar in a bowl with the softened butter and eggs. Use your hands to mix everything. Slowly pour in the oil while continuing to mix everything together. Once incorporated the dough will barely hold together when squeezed. Very slowly add the orange blossom water while kneading. The final dough should be pliable and elastic, somewhat similar to a pasta dough.
Filling for Ka’ab Gazelle
(the ingredients here were a little more precise!)
- 1 kg almond flour
- 150g butter
- 250g powdered sugar
- 1 tsp cinnamon
- pinch of grated nutmeg
- 1/2 tsp orange blossom water
Mix all of the ingredients together to form a paste that sticks together when squeezed.
Before you shape the pastry you’ll also need to crack an egg to serve as an eggwash.
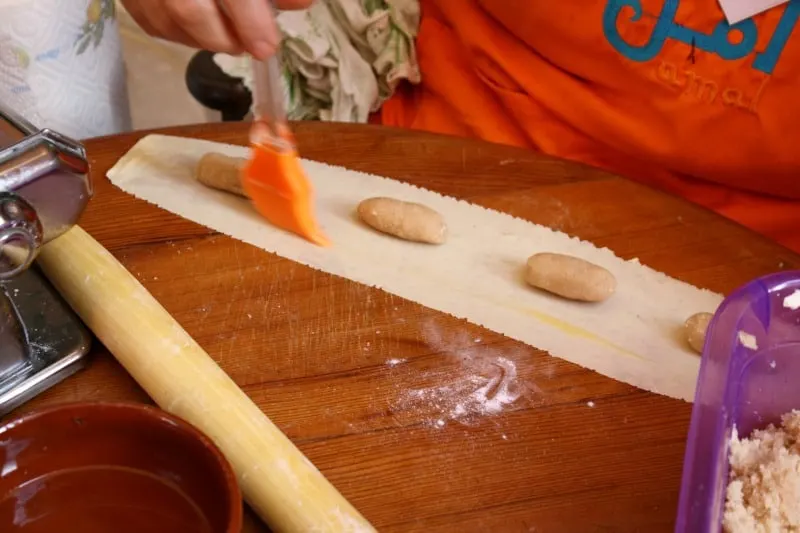
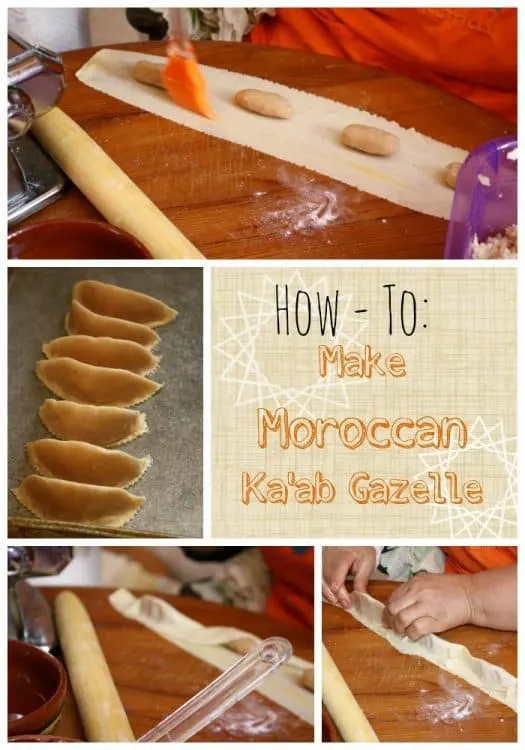
Start by running the dough through the pasta machine to create a long sheet of pastry approximately 4″ wide. Keep running it through the machine until the dough is almost transparent – as thin as you can get it before it breaks. Pinch a ball of the filling weighing about 10grams and roll to a thick log (see picture). Place on the dough strip with equal space between them. Brush eggwash to seal the dough directly above the filling.
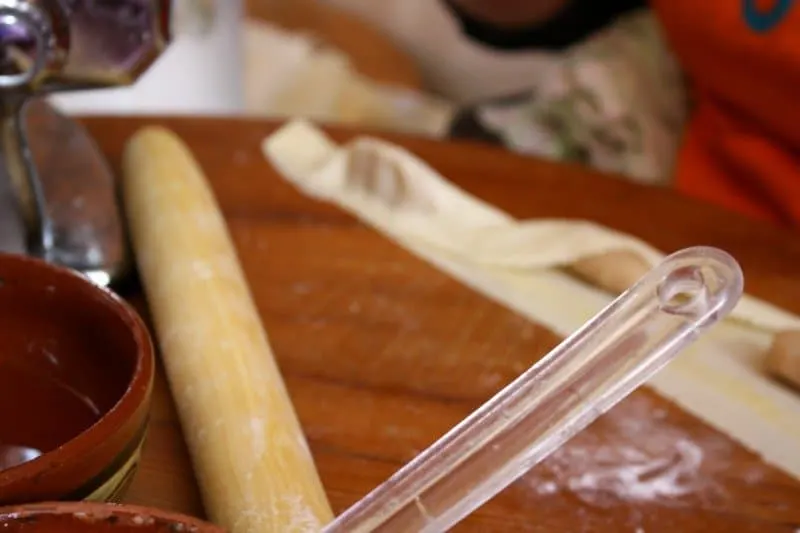
Fold the dough in half and make a small crescent or crown shape. Continue for all of the filling balls. Do not pull the dough too tight as you will need a little wiggle room as you continue to shape the cookies.
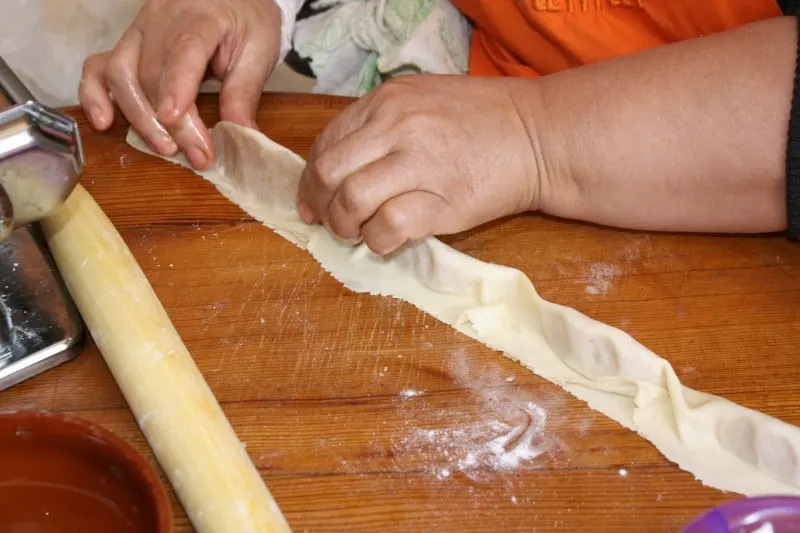
Very carefully and slowly beginning at the bottom of the filling work the filling up into the dough on top. It should be close to 1″ in height when you are complete. As you raise the height of the cookie you also should gently pull the cookie in towards you to create the crescent shape. Take your time as the dough can break and then you’ll have to cut off that portion and start again.
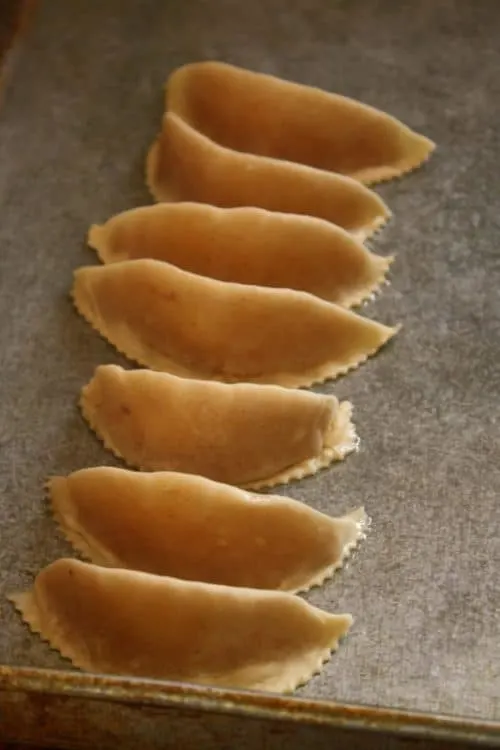
Once the cookie is high enough, use the rib edged pastry cutter to cut off the excess dough. Leave a small amount of dough at the base of the cookie but not much. Place the cookies on an oiled baking pan and put into a 350F/175C oven for 10-12 minutes. The cookies will be a very pale brown when cooked through. They should not be crunchy.
That’s it!
Don’t worry if your first few attempts at shaping the cookies are not successful, it takes some time and practice to get it right. Be sure to come back next Monday where I’ll show you another way of shaping cookies using the same pastry and filling.
Pin for Later!