
Are you tired of carrying around two phones, one with an eSim and the other with a physical sim? Wondering if there is an easier way to switch between carriers without any hassle?
Well, guess what? You can now manage multiple phone numbers on your device just by installing an eSim!
Whether you have an Android or IOS device this comprehensive guide will show you how easy it is to set up and activate your very own eSim. So get ready to say goodbye to burdensome SIM cards forever!
What is an eSim?
Do you remember the days of swapping out SIM cards, trying to keep track of the tiny pieces of plastic as you moved from one phone to the next. It was a hassle, to say the least. But with eSIMs, you don’t have to worry about any of that.
An eSIM, or embedded SIM, is basically a SIM card that can be installed into your device and can be activated remotely by your cellular service provider. With an eSIM, you can switch between carriers and plans plans without ever touching a physical SIM card. It’s hassle-free and incredibly convenient, especially when you’re traveling and need to switch between networks seamlessly.
Furthermore, eSims are particularly beneficial for those who have dual SIM phones or want to use both their personal and work numbers on a single device. You can enjoy the flexibility of managing multiple phone numbers without the need for extra physical SIM cards. Now let’s dive right into the exciting part—setting up your device for an eSim!
eSIM Installation Requirements
Before installing eSim on your iOS or Android device, there are a few prerequisites to ensure a smooth installation process. Please take note of the following:
- Unlocked Compatible Device: Make sure you have an unlocked device that is compatible with eSim technology. This will allow you to activate and use eSim functionality.
- Stable Internet Connection: A stable internet connection is essential for a successful eSim connection. Ensure that you have a reliable internet connection before proceeding with the installation.
- Data Security: Installing your eSIM will not compromise the use and validity of your data. However, please note that the validity of your eSIM will only start once you are connected to the local operator at your destination.
By ensuring these prerequisites are met, you can have a seamless eSIM installation experience.
Step By Step Guide To Install An eSim (IOS & Android)
Installing eSim on iOS involves the following steps:
- Go to Settings on your iOS device.
- Tap on “Mobile Data” or “Cellular” (depending on your iOS version).
- Select “Add Data Plan” or “Add Cellular Plan.”
Choose the option to install eSim via manual installation or QR code.
a. Manual Installation: Obtain the eSim details from your carrier’s website or through their customer support. Enter the necessary information manually to install the eSim.
b. QR Code: If your carrier provides a QR code, scan it using the device’s camera to automatically install the eSim.
- Label your eSim: Assign a name or label to your eSim for easy identification.
- Set a Primary Line or Default Line for calling purposes: Select which line you want to use as the primary line for making calls.
- Select a primary plan for iMessage, Apple ID, and FaceTime: Choose the eSim plan you want to use as the primary plan for these services. Click “Continue” to proceed.
- Set the eSim data plan as default: Ensure that the eSim data plan is set as the default plan to avoid unintentional usage of another data plan. To prevent automatic switching to a different data plan while roaming, it is recommended to turn off the “Allow Data Switching” option.
- Edit APN settings (if required): If your carrier requires specific APN settings for data access, you can update them by going to Settings > Mobile Data > select your eSim plan > Mobile Data Network. Enter the APN settings provided by your carrier.
By following these steps, you should be able to successfully install and configure eSim on your iOS device.
Installing eSim on Android involves the following steps:
Installing eSim on Android devices can be done using two methods, and the steps may vary depending on the device. Here are the general steps for each method:
Way 1 – Scan the QR Code for eSim:
- Obtain the QR Code for your eSim from your carrier. This can typically be found in the eSims section of your carrier’s website or through their app.
- On your Android device, go to “Settings.”
- Tap on “Network & Internet” or a similar option depending on your device.
- Look for the icon parallel to “Mobile Networks” and tap on it.
- If prompted with a message that says “Don’t have a SIM card?,” click “Next.”
- Select the option to scan the QR Code provided by your carrier.
Note: If additional network preferences are required, go to “Network & Internet” and tap on the mobile network to set the correct network preferences as indicated in the additional information from your carrier.
- Under “Mobile Network,” you will see your eSim. Turn it on and enable the data plan.
- To avoid roaming charges, enable Data Roaming while turning off primary line data.
Way 2 – Installing eSim manually:
Access the manual installation details for your eSim from the “My eSims” section of your carrier’s website or app.
- On your Android device, go to “Settings.”
- Tap on “Network & Internet” or a similar option depending on your device.
- Look for the icon parallel to “Mobile Network” and tap on it.
- If prompted with a message that says “Don’t have a SIM Card?,” select it.
- You will be asked to enter the code manually, which is typically called the SM-DP+Address. Enter the code provided by your carrier and proceed with activation and confirmation.
- Turn on your eSim under “Mobile Network.”
- Enable “Mobile Data” and “Data Roaming” if required.
By following these general steps, you should be able to install and activate eSim on your Android device. Please note that the specific steps may differ slightly depending on your device’s manufacturer and Android version.
Choosing the Best eSim Provider
With the availability of numerous eSim providers, selecting the right one for you can be overwhelming. However, making an informed choice is crucial to ensure a seamless and reliable connectivity experience.
My Pick: Airalo
Founded in 2019, Airalo is the world’s first eSIM store, revolutionizing the way travelers connect. By offering digital SIM cards, known as eSIMs, Airalo provides instant access to a wide range of digital data packs from over 200 countries and regions. With Airalo, gone are the days of worrying about high roaming charges and the struggle to find reliable Wi-Fi while exploring new destinations.With a simple download and installation process, travelers can stay connected as soon as they land in their chosen destination.
With over 1 million users and counting (as of August 2022), Airalo has become a trusted companion for travelers around the world. Their commitment to making global data connectivity accessible and hassle-free is fueled by a $5.4 million Series A funding investment.
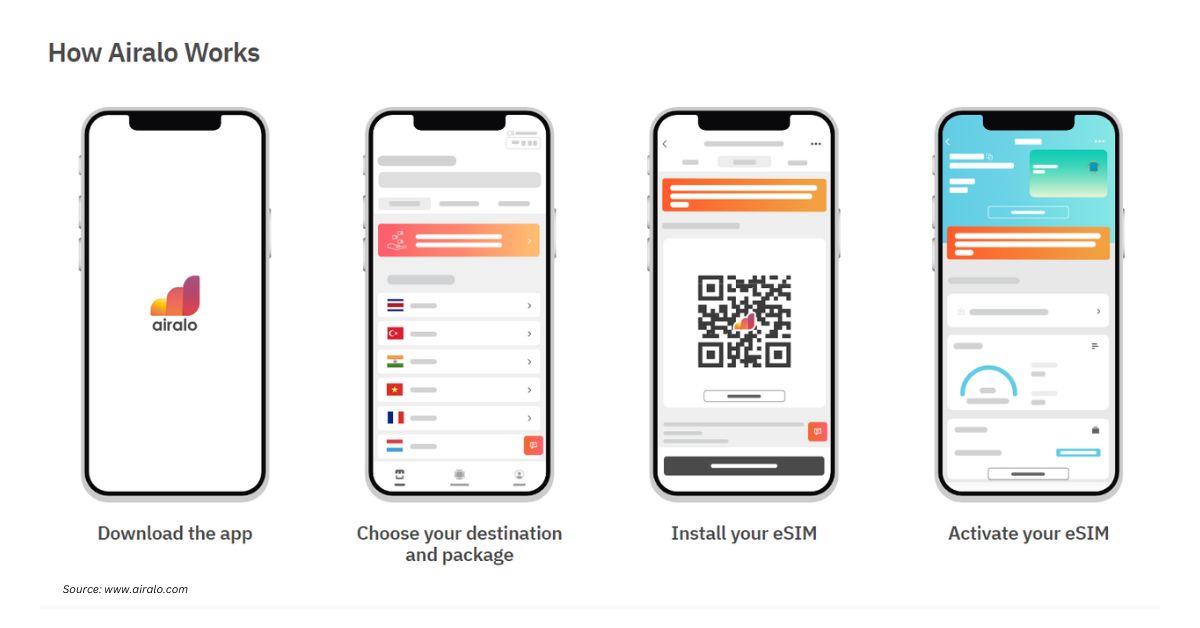
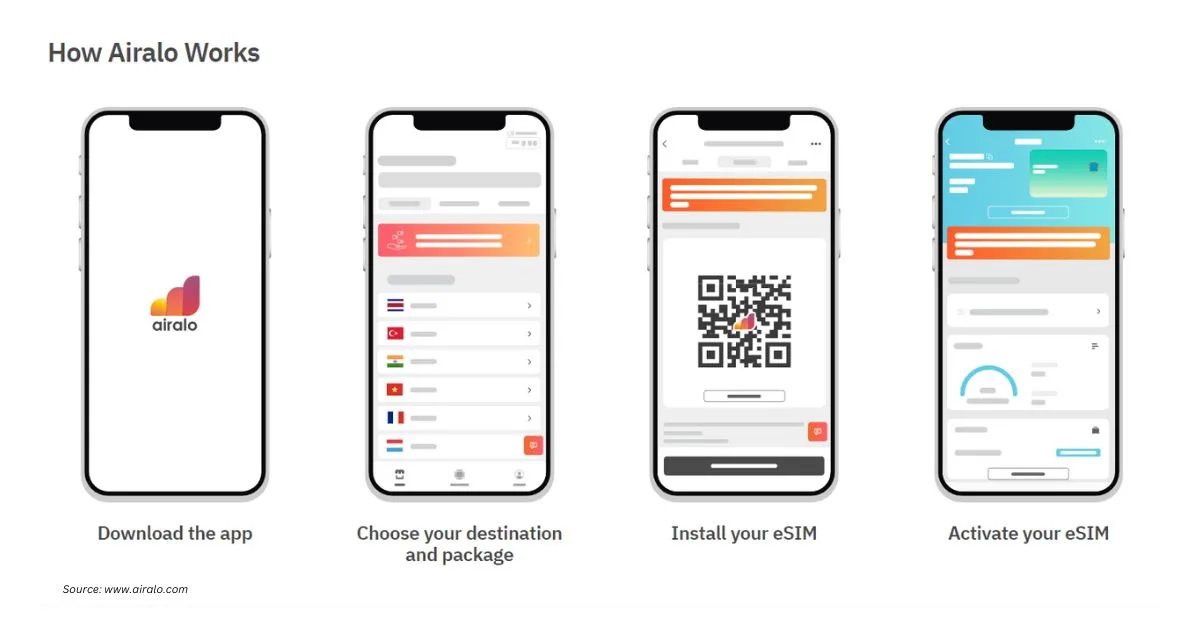
How To Install and Activate an Airalo eSIM
Here are 7 simple steps to install and activate your Airalo eSIM:
- Buy an eSIM: Visit the Airalo website or download the Airalo app. Choose the eSIM for your destination based on factors like data amount, validity period, and price.
- Install Your eSIM: Ensure a stable Wi-Fi connection. Install your eSIM using one of the following methods:
a. Direct: Follow the prompts in the Airalo app.
b. QR Code: Scan the QR code provided.
c. Manual: Enter the eSIM details in your device’s Settings.
- Label Your eSIM: During installation, label your eSIM to distinguish it from your main SIM. For example, label it as “Egypt eSIM” for easier identification.
- Check Activation Policy: Review the eSIM’s activation policy in the Additional Information section of the Airalo app. It will indicate when the validity period begins.
Connect to a Local Network on the phone:
a. Go to Settings.
b. Tap Cellular.
c. Select your eSIM line.
d. Toggle on “Turn On This Line.”
e. Toggle on Data Roaming.
f. Tap Network Selection and choose a supported network.
Connect to a Local Network on Android:
a. Go to Settings.
b. Tap Network & Internet.
c. Tap Mobile Network.
d. Turn on your eSIM.
e. Turn on Mobile Data.
f. Turn on Data Roaming.
g. Select a supported network.
Enjoy Your eSIM: Once connected to a supported network, your eSIM is activated. You can now enjoy seamless data connectivity during your travels.