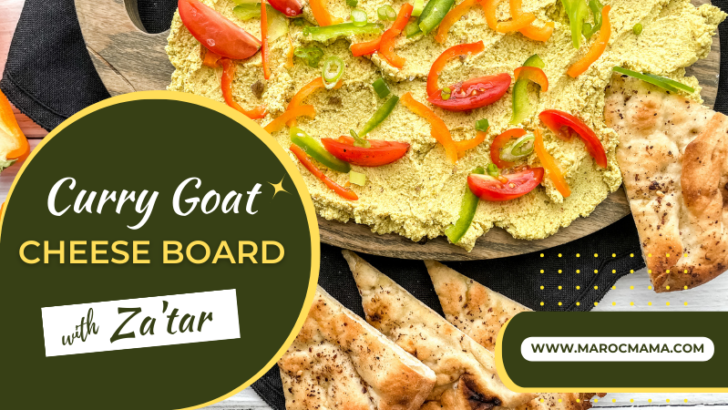
In the small town I live in there is one Indian restaurant and it’s on the verge of going out of business. It’s not the best, and certainly not the most authentic but they have a decent lunch buffet that includes as much naan as you can eat and I can’t pass that up. I’ve learned that it’s really not that hard to make most Indian foods at home and for the most part they are healthy. With the threat looming of losing the one and only Indian restaurant within 100 miles (yes really), it has become apparent that I need to start flexing my Indian cooking powers.
Last week I introduced you to Saffron Road’s new line of Simmer Sauces that include a Tikka Masala sauce. The sauces come completely ready to use, just cut open the package and heat up. Really can it get any simpler? Instead of using the sauce in a traditional way, I decided it would be a great sauce for potatoes. I was a little apprehensive and after making these I left them on the stove as I ran to pick up M from a friend’s house. I knew it was a great idea after receiving a call from MarocBaba while I was on the road.
Him “Babe what’s on the stove?”
Me: “Oh it’s a new potato recipe I tried.”
Him “Well you better get home soon because I don’t think there will be any left if you’re gone too long.”
Needless to say 1/2 the original contents were missing by the time I returned.
This recipe isn’t complicated in the least and is a fabulous side dish to go with any number of main course ideas. I made a yogurt chicken (post forthcoming). To begin simply peel 5 medium size potatoes and cut into cubes or rounds between 1/4″ and 1/2″ thick. The size doesn’t matter – just be consistent so that they all cook in the same amount of time.
Isn’t the color of the Tikka Masala simmer sauce lovely? I really think the best part is that when you read the ingredient list you WILL be able to recognize every item listed. There’s no bicarbocrappola and monoglutanimanmoomoo. It’s real ingredients like tomatoes, spices, garlic etc. Love that.

Once the potatoes are cut, simply boil in water until they are fork tender. You do not want them to fall apart when you poke them but your fork should go in easily. Drain the water very well. Return the potatoes (gently!) to the pan. Pour the contents of the Saffron Road Tikka Masala sauce on top. Stir with a soft spatula or very gently with a spoon to coat the potatoes. Turn the burner heat to low and allow the temperature to increase. You can also add frozen (or fresh) peas at this point. If you like peas add a lot – the amount is up to you. Within 5-10 minutes your Bombay potatoes are ready to eat!
I made a yogurt chicken recipe to serve with the potatoes – watch for that post in the next few days.
In other exciting news who wants to try these simmer sauces? I hope you’ll join me next Thursday May 10th at 8pm Eastern for a Simmer Sauce inspired Tweetchat!! Please be sure to RSVP below to join me. We’ll be chatting on hastag #SRFSS (Saffron Road Foods Simmer Sauce. Only those who have RSVP’d will be eligible to win. Bring your cooking questions and I’ll be giving away Saffron Road goodies.
Before I go, what are some of your ideas for using this simmer sauce in your kitchen?
Pin It Read MoreA revelation I had during this trip to Morocco was that our diet has clearly changed. While we were once eating meat at every meal we have really relaxed a lot on the quantity and types of meat eaten. If we do eat meat it’s most likely chicken or turkey. You might find red meat on our table once a week. Maybe. Within 3 days of our trip I felt like I had meat coming out of my ears. No one wants meat coming out of their ears. Not kidding I was almost in tears I wanted a salad so bad. I cobbled together a little meal and trust me cucumbers and tomatoes never tasted so good.
This is not that meal.
Ha! I almost had you! This little meal I put together before we left and I was trying to use up all of our CSA veggies so that they wouldn’t spoil. The salad is really very simple with just some spicy mixed greens, sweet cherry tomatoes, very thinly sliced yellow heirloom tomatoes and red peppers and a good smattering of goat cheese drizzled with extra virgin olive oil. Yum.
I put my very favorite side dish with the salad. Gratin Dauphinois or Potato Gratin. Potatoes and Cheese. You really can’t go wrong there especially on a chilly fall night. Check out this recipe for them from Gratinee.
Read More
This post is a little late in coming and might be too late for some of my fellow northerners but certainly there still is fresh sweet corn in other parts of the country. Last year I started freezing more produce because we bought a large chest freezer. It was a great buy and has saved us a lot of money. I live in an area where there is a lot of farming and happen to know many people who grow food, and grow a lot of food! This year we were lucky to have a friend of my mom offer us free reign on their cornfield. I came out with over 100 cobs of corn.
MarocBaba got roped into the processing of the corn because it was a huge job. Just shucking all that corn took us almost an hour. I set up two big cleaning stations outside. One was for all of the husks and another was full of fresh water to clean the cobs. A final station was for cutting.
A little trick that I found to cleaning off the pesky hairs that remain is to use a medium coarseness scour pad. It cleans off the grit and grabs those hairs. Simply rinse well between ears.
After the corn is cleaned is time to cut off the kernels. I’ve re-purposed a bundt pan to facilitate cutting. Simply push the skinny end of the corn into the top hole and then using a sharp knife cut down the sides. The kernels will fall into the pan and it will be much easier and safer to cut. Continue this until the pan is full.

In a large pan on the stove. (I use a huge chicken frying pan) Add plenty of butter (2-3 tbsp) and let it melt. Season the corn with salt and pepper and mix well to incorporate the seasoning and butter through all of it. You could add any other seasoning that you’d like.
Spread the corn as flat as you can so that it can cook. This only takes 5-6 minutes, as it’s not fully cooking the corn. You can taste it and add more butter or seasoning based on the taste.
When the time is up remove the corn from the pan and place in a bowl or on a cookie sheet. The flatter you can lay the corn the faster it’s going to cool off. Once cool move the corn into containers. I use Ziploc freezer bags. I think that it’s best to do this in quart size containers. You don’t want to freeze all of the corn together unless you plan to eat it all at one time. A smaller bag is easy to grab for dinner or other meals.
That’s really all there is to freezing corn!
Read MoreI read a lot, a LOT of blogs and I came across hasselback potatoes somewhere and filed the idea away into the back of my mind. One night I remembered this idea and decided to give them a shot. I loved them and think that they would make a really good side-dish for a party because they are unique. I love unique but easy dishes!
Ingredients
Directions
Peel each potato all of the way except for a small part on the bottom of each. Using a very sharp knife cut slices into the potato but DO NOT cut all the way through the bottom skin. The thiner you can slice the better. Preheat oven to 375F.
Drizzle each potato with olive oil, try to get it in between as many layers as possible. Sprinkle each with salt and pepper. I then sprinkled 2 with cumin and 2 with paprika. How much seasoning you add is up to you. The more you add the more powerful the flavor!
Place potatoes into the oven and cook 50 minutes – 1 hour until tender. Remove from oven and double check doneness.
At this point they could totally be eaten and be very very tasty. Or you can take it a step farther…
Add a pat of butter and some Greek yogurt on top. Now dig in!
Read More

I missed posting a recipe last week because I’ve been down and out with pnuemonia for the last two weeks. I most likely won’t make the leek and potato soup that’s on tap this month in my weeks absence. Today was the first day I have been feeling much like being up and around in the kitchen. I think that a little sickness was good for my creativity in the kitchen though! I have been able to develop a handful of new recipes and test them with great results!
This recipe however is not my own. Today like every Friday, the recipe comes from Around My French Table: More Than 300 Recipes from My Home to Yours by Dorie Greenspan. I was really excited to try this dish but a little apprehensive too. I’m not big on cooked carrots. The recipe was really easy and it made a great side dish to a chicken meal that I had made for lunch.


Why is it that I am the only one who likes cauliflower in this house? I don’t just like it – I love it! Raw, cooked, mashed, steamed, you name it there’s no way I don’t like it! When I made chicken tikka the last time I had a head of cauliflower taking up real estate in the fridge and decided something needed to be made with it. I came up with this super easy and fast recipe with a few Moroccan flavors, hoping that my boys would bite and gobble it up. Sadly they still don’t like it, but I didn’t really mind eating most of it myself!
Ingredients
1/2 head of cauliflower
2-3 tbsp olive oil or argan oil
2 tsp cumin
1 tsp white pepper
1 tsp sea salt
1/2 tsp garlic powder
Directions
Cut up and clean the cauliflower florets. In a small bowl whisk together the olive oil and spices. Spread out the cauliflower on a cookie sheet. Drizzle the olive oil over the top. Mix well so that the cauliflower is coated. Place into a 350F oven and cook for 15 – 20 minutes until cooked through and slightly browned. Great side dish!! Note: For a different and unique taste use argan oil instead of olive oil. It will add a nutty toasted flavor that is very nice!

I have been dying to share this all week. I was on top of my game this week and made Dorie’s Potato Gratin on Monday night and it was ahhhmazing! Even my kids were gobbling it up, gruyere cheese and all! I also may have cheated and made next week’s recipe (a delicious roast chicken) the same night. This recipe was incredibly simple.

My first problem was how many potatoes to use. I went with these 5. The next problem was that I don’t have a mandolin so I had to cut these very thin by hand. I used a softer yellow potato that would cook relatively fast. Problem three, I was out of cooking butter so I had to use my butter spread. The good news – everything turned out!

After warming up the heavy cream mixture and layering it with the potatoes, I realized I forgot another step – to add salt and pepper between the layers! Too late for that now, so I sprinkled some on top.
The final step is to top with gruyere. So I live in Wisconsin, the dairy capital of the country. We have a lot of cheese. Gruyere happens to be one that we don’t have a lot of. So I found some…and it cost me well..about $10 for a 1/2 pound. On this shopping trip – there was a huge assortment of cheeses….
Gruyere wasn’t there. It was hidden away with the other imported snotty cheeses. We Wisconsinites like our local stuff. Guess what…I really like gruyere! So Wisconsin cheese artisans here’s a little plea from me…please make me some gruyere! Or make me something like gruyere!

The best part of this recipe is how simple it is, really only a handful of ingredients. I made mine in a springform pan. This wasn’t the best idea because it doesn’t have a tight seal but it did allow me to make sure all the liquid was cooked off. Doesn’t that cheesy goodness look delicious??
This was easy to cut into wedges and serve. It was a little bit rich but there is a lot of cream in it. I know that adding more salt and pepper and probably some herbs would have made a big flavor difference. I’ll be making this again with those additions.
I’m really enjoying these weekly cooking challenges and this cookbook. If you are looking for a great cookbook for a foodie friend pick up Dorie Greenspan’s Around My French Table: More Than 300 Recipes from My Home to Yours. If you’re interested in participating in the Friday challenges head over to French Friday’s with Dorie and join us!

What people are saying…